Part 2 of the sampling in Ableton Live 9 tutorial series – exploring some advanced settings and how to create a custom slice preset and chop our samples MPC style building off the fundamentals we discussed in part 1.
Sampling in Ableton Live 9 (MPC style)
Just to recap quickly what we covered in the last video – a jump start into how to use the Slice to New MIDI track feature in Ableton to very easily chop up your samples and start making your sample-based production right away.
In this tutorial, we’ll be diving deeper into some of the more advanced sampling features and functionality in Live 9 and explaining step-by-step how to create a custom slice preset. You’re somewhat limited with the default slicing preset, and so you’ll more than likely want to personally customize it – specifically if you’re trying to emulate MPC style features.
How to Create a Custom Slice Preset
With the “Built-in” slicing preset we used to chop our sample in part 1, Ableton defaults to using a Simpler instrument for each of the sample slices within the drum rack. For our custom slice preset, we’re actually going to use a Sampler instrument instead. Why? A Simpler instrument is very basic in terms of the settings and overall control over the samples that you have, and the Sampler unlocks much more functionality for us. You can use a Simpler instrument if you like, but we’ll be using a Sampler for the purposes of this tutorial.
Step 1
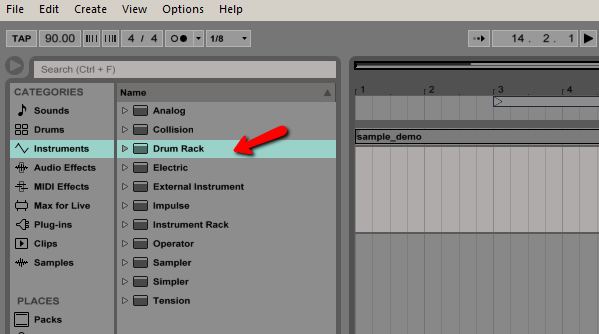
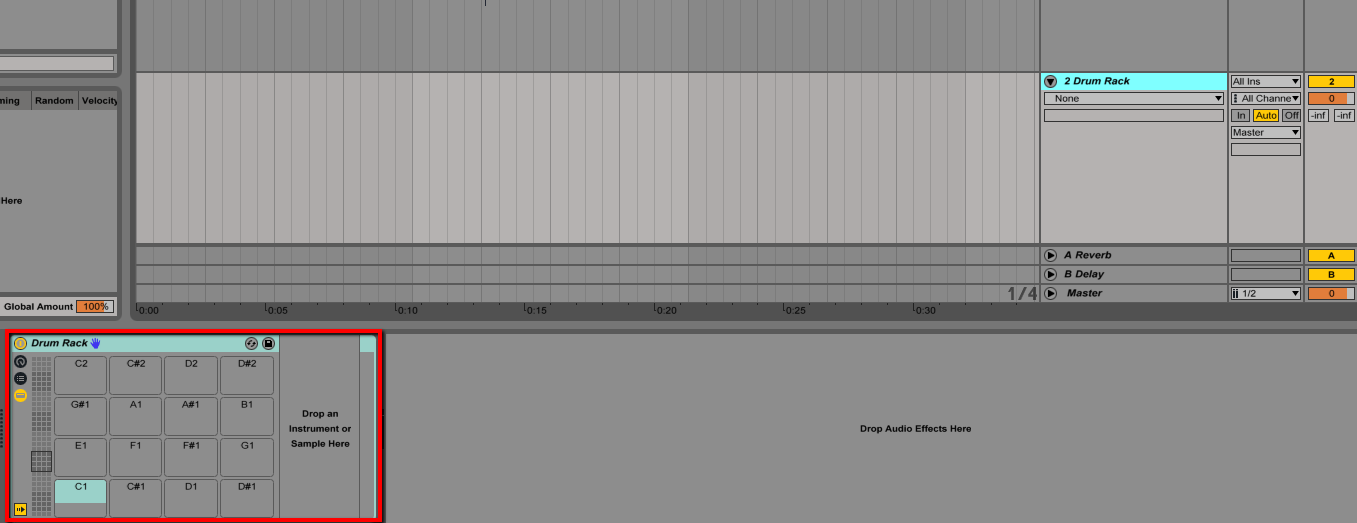
Drag an instance of a Drum Rack Instrument to a new MIDI track.
Step 2
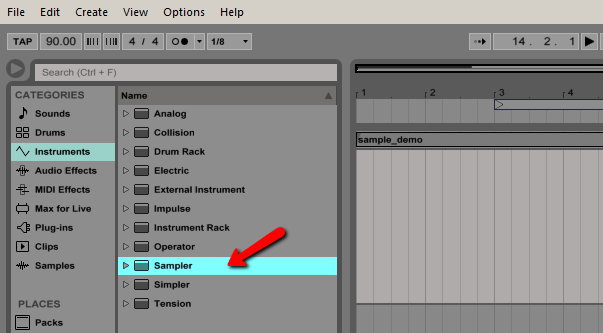
Drag a new instance of a Sampler instrument into the C1 cell of your Drum Rack.
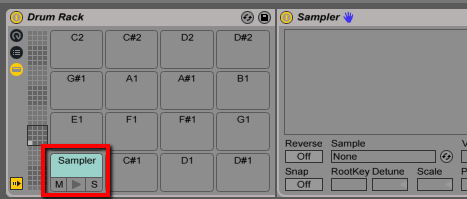
This is basic structure of setting up a custom slicing preset. Now all we have to do is customize and set up our own personal settings to be saved within our preset.
So what would be some of these settings that we would want to utilize? Well, in this tutorial I’m going to show you how I would personalize my own preset to chop up my own samples. Feel free to experiment and customize it to your specific needs 🙂
1. Map Transpose Macro
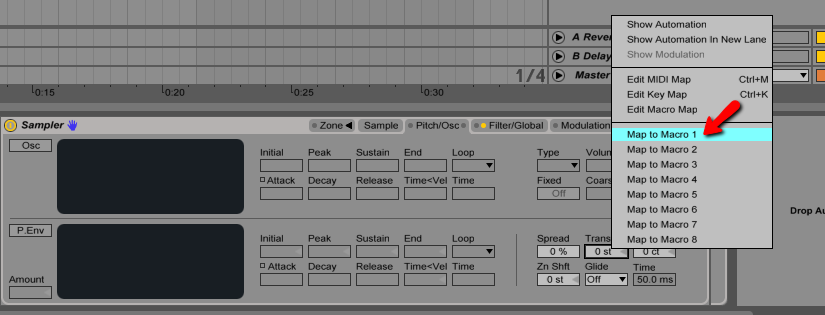
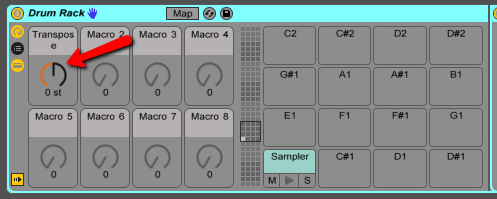
With the click of a button, you can easily map the transpose setting of the individual Sampler to the global Drum Rack macro. That way once you’ve chopped your sample, you can simply use the macro knob to adjust the pitch and speed of every sample slice simultaneously.
Within the Sampler: Pitch/Osc > Transp > Right Click > Map to Macro 1 (or other macro of your choosing)
NOTE: Once you’ve mapped the transpose macro, I recommend you change the -48 st –> 0 st. This will ensure that your sample starts out in the original speed and tempo once it’s sliced using this preset.

2. Enable Choke Group
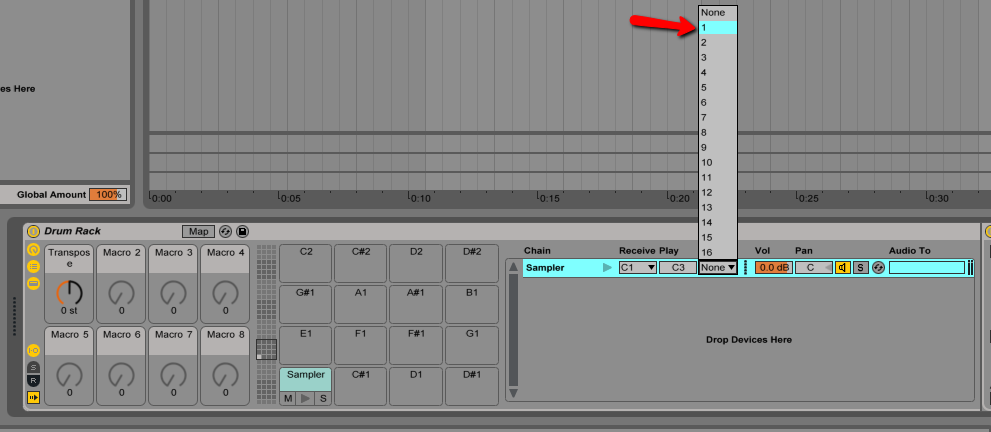
Setting up a choke group for your samples will enable you to trigger your samples like you may be familiar with using a MPC or other drum machine. Specifically, this will give you the ability to cut off any previously triggered sample when a new sample is triggered. This will eliminate any bleed over or overlap on any of your sample chops.
Within the Drum Rack: Show/Hide Chain List > Show/Hide Input/Output Selection > Choke > Select ANY Choke Group (1-16)
NOTE: Ableton gives you up to 16 different choke groups to use, but in this case it doesn’t matter which one you pick.

3. Increase Release
This is another feature that’s really convenient for any sample-based producer. By increasing the release setting inside the sampler, there’s no need for you to continue holding the pad (or MIDI key) down for the duration of the sample. I recommend taking your Release setting all the way up- 60 seconds maximum in Ableton Live – but that would be entirely up to you.
Within the Sampler: Filter/Global > Release > Increase from 50 ms to 60 s (maximum release time)

4. Increase Global Volume
This is how much influence MIDI note velocity will have on the Sampler’s volume. In other words, if you leave this setting at 0, the MIDI note velocity variations will have no actual effect on the volume of the individual MIDI samples. You may want to experiment with some different percentages here, but I’m increasing it from 0% to 50% in this demonstration and this particular setting works well for me personally.
Within the Sampler: Filter/Global > Vol<Vel > Increase from 0% to 50% (you can change this to your preference)

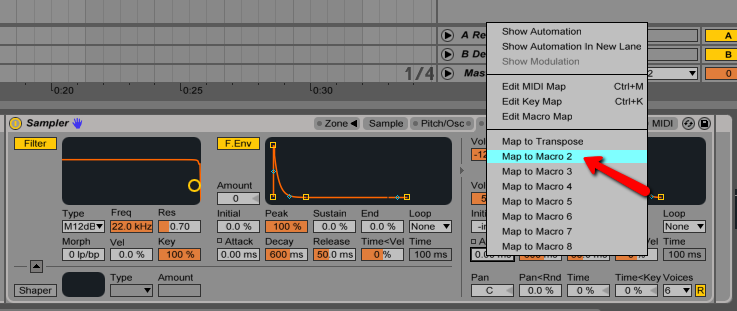
5. Map Attack Macro
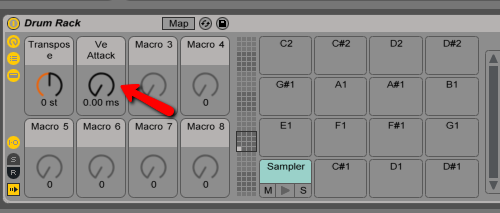
The “attack” feature will allow you to quickly fade-in the beginning of your sample chops. This can be particularly helpful when you have samples that start on a drum/percussion hit or if the sample otherwise just needs cleaned up a bit.
Within the Sampler: Filter/Global > Attack > Right Click > Map to Macro 2 (or other macro of your choosing)
NOTE: Again, feel free to add or delete any of these settings to your specific needs

Saving Your Custom Slice Preset
Now that we have our preset set up the way we’d like, now we simply need to save it and make sure it’s in the correct Ableton Live folder.
Step 1
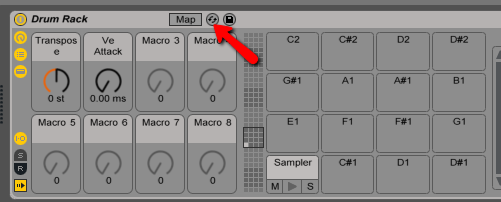
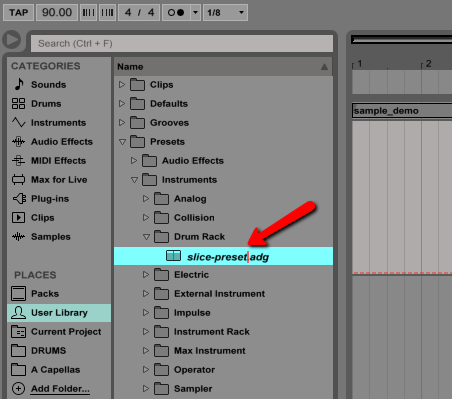
Simply click the Save Preset button and choose a name for your preset and press enter. This should now create an .adg file in the User Library>Presets>Instruments>Drum Rack>slice-preset-demo.adg.
Step 2
We now need to drag our preset into the following folder: User Library>Defaults>Slicing
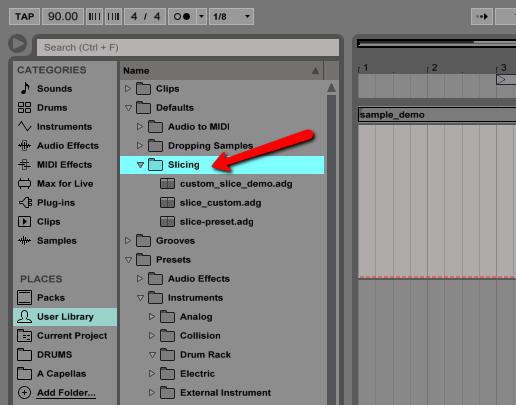
And now when you slice a new sample as we explained in the part 1 tutorial, you should see the custom preset you just saved in the Slicing Preset dropdown. Once you test it for yourself and chop a sample using this new preset, you’ll see that all of the settings and macros we mapped have been saved and applied 🙂
Let’s Connect!
DID YOU FIND THIS VIDEO HELPFUL? DON’T FORGET TO LIKE, COMMENT & SHARE 🙂
I’m very reachable on the following: Official Website | YouTube | Facebook | Twitter | Soundcloud | Instagram

Comments (0)